Rings, Rings, Rings
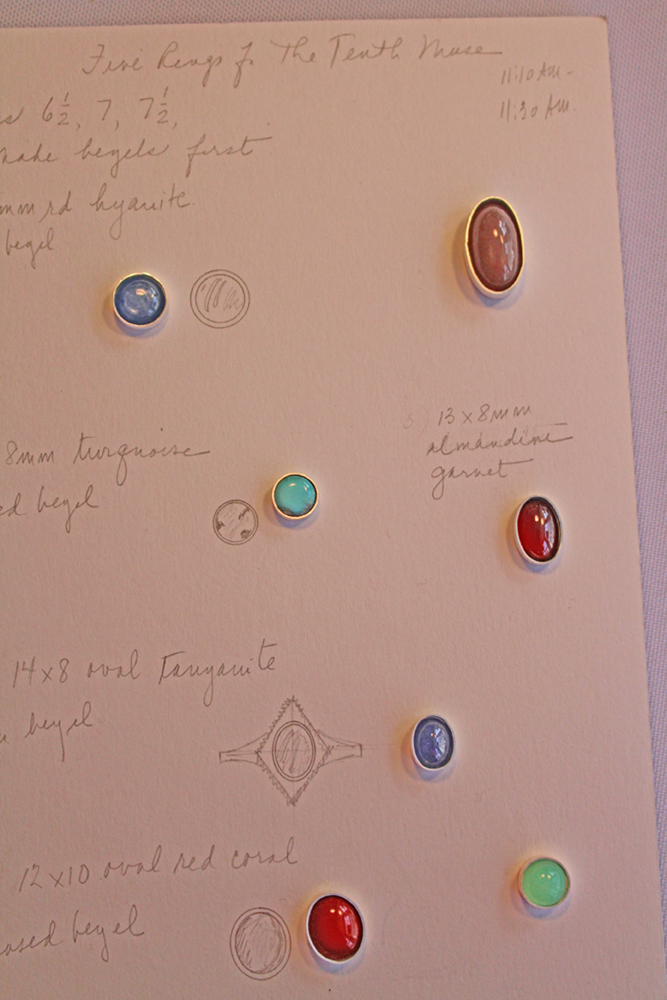
I have a surfeit of rings and so I decided to make 5 new ones. I went through my stone stash and took out several cabochons. Eventually I decided to use a round turquoise, a round kyanite, an oval coral, an oval tanzanite and an oval rhodolite garnet. I then sat down and sketched out some ideas although, first, I made bezels for the stones. Below is a picture of my rough sketches accompanied by their respective stones.
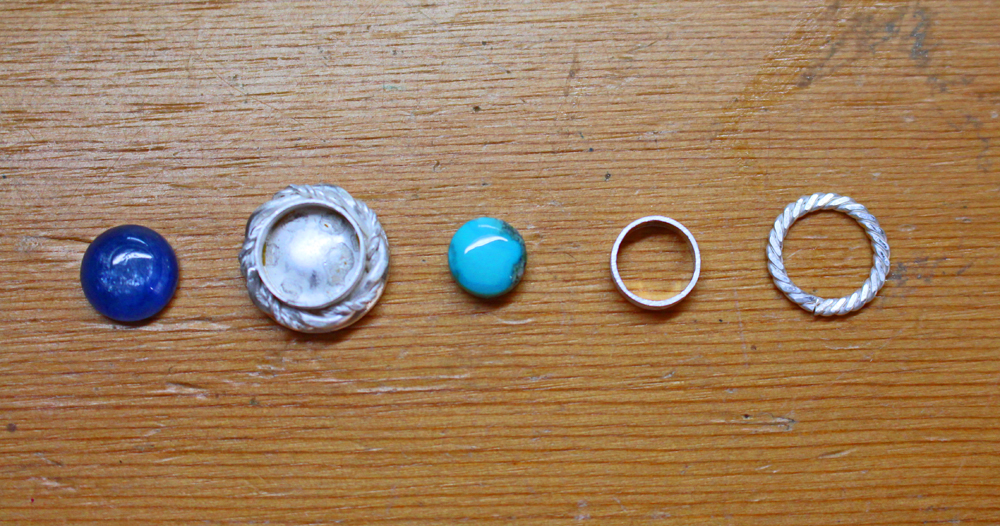
When I’m making a series of jewelry pieces, I start with the simplest designs first and add on. So I began with the turquoise and kyanite stones. I already had in mind the things I wanted to do, so I went ahead and fabricated the heads of these rings. Heads is a factory term in ring manufacturing that indicates that part of the ring that holds the stone and is a term most often used by engagement ring manufacturers. Unfortunately, I got ahead of myself — below is a picture of the two rings, the kyanite head completed and the turquoise head in pieces.
Now that the heads are completed, I work on the shanks. That’s another term from the ring manufacturing world that indicates that part of the ring that goes around the finger. Again, I had a good idea of what I wanted to do, and so I went ahead and fabricated a shank for the turquoise head from square wire. The below picture shows the completed head and the shank.
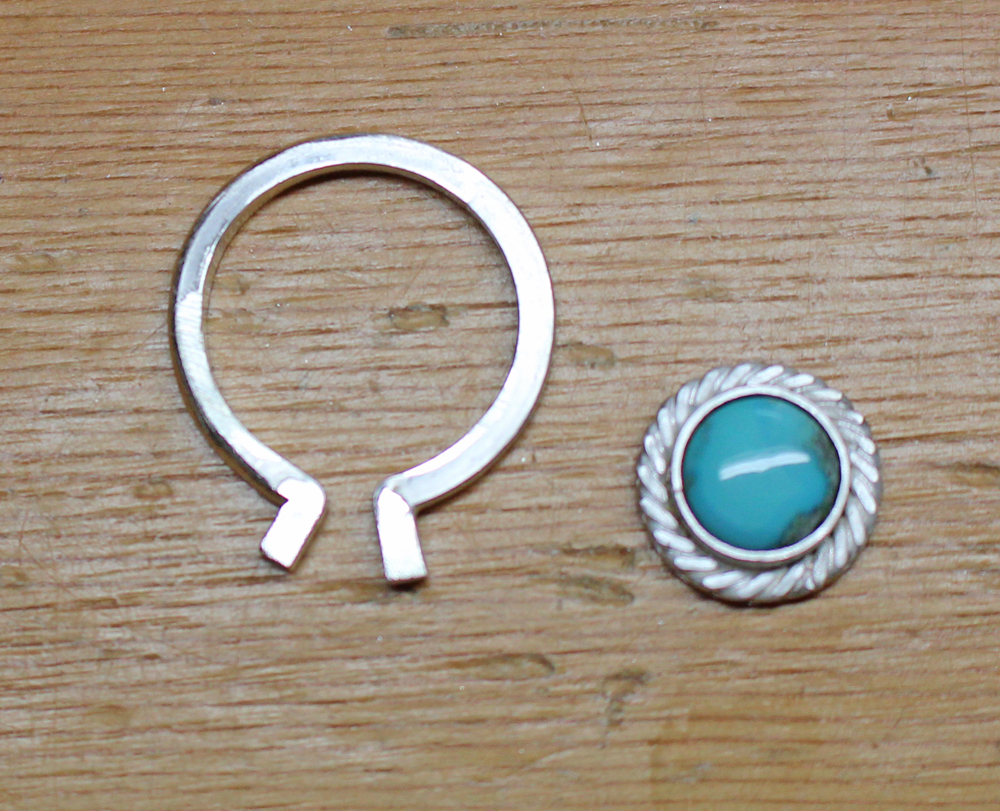
I will true up the ends of the shank so it will sit properly on the back of the head. Below is a picture of the head and shank ready for soldering.

Once the shanks are soldered onto the heads of the rings, I can clean them up, removing any solder mess, sanding the metal (removing any scratches that arise), and then going through the initial polishing. Below is a picture of both the turquoise and kyanite rings that have been sanded and initial polished and are ready for setting.

Now both rings have been set with their stones, and I’ve done the final polishing. When I showed my friend and fellow jeweler the rings, she suggested I make bands for them as the bands would sit nicely below the heads. Below are pictures of both rings with simple bands that I made as per my friend’s suggestion.


Next I decided to work with the coral cabochon; this ring I give the name, Carol, as it is an anagram of coral. Again, I know what I want to do with this ring and so I don’t need to do any sketching or pattern drafting. Below is a picture of the components that will go into Carol’s head.

I can solder all the above components for the setting in one go, and so I do that. Below is a picture of Carol right after I did the soldering. You can see what is called solder mess around the inside and outside elements.

I decide to make a split shank. I take two pieces of square wire, solder them together in one spot and then fabricate the arms of the split shank. It’s hard to imagine, so below is a picture of the head of Carol with the split shank.

The setting has been cleaned up; the stone is merely sitting in the head. The split shank is ready for soldering. Once it’s soldered, I continue with the usual process of cleaning up any solder mess, sanding the metal removing any scratches and then doing the initial polishing. Below is a picture of Carol finished. I bet you’re surprised that I oriented the longest side of the head horizontally rather than vertically.

And here’s a picture of Carol from the side so you can see the split shank.

For the next two rings, using the oval stones (tanzanite and rhodolite garnet), I will make totally different shanks. And for the tanzanite ring, I need a pattern. Below is a picture of the pattern and the decorative elements as works-in-process for the tanzanite ring.

Once the decorative elements are fabricated to fit the pattern, they will be soldered to sheet metal. Below is a picture of the soldering process; one side of the ring has been soldered on and the excess or selvage trimmed off. In the picture, too, you can see the small pieces of solder (called paillons, a term borrowed from the French) along the edge of the decorative element.

After soldering and trimming, I will round up the ring. The bottom of the bezel setting will be filed in a contour that will match the contour of the rounded ring. When working with silver, components must sit exactly because silver solder will not fill holes. When the filing of the bezel is completed satisfactorily, I will solder the setting onto the ring. Below is a picture of the fabricated ring that has been sanded and is ready for initial polish and the setting of the stone. Yes, I made a hasty decision to add the balls in the corners.

Here is the ring fully finished. In addition to the setting of the stone and the final polishing, I took an extra step in blackening the silver around the shank so that the twisted wire would be highlighted.

The rhodolite garnet ring also required a pattern. Below is a picture of the drafted pattern. Please note that patterns are always drafted to size — as you see from the picture, this ring was to be a size 7 1/2.

I’m still not used to taking photographs while working, so I got ahead of myself. I cut out the pattern shown above, filed the lines, and rounded the ring. Below is a picture of the ring, a work-in-progress.

The twisted wire in the background of the picture above I will use to go around the bezel. This bezel, like the one for the tanzanite ring, will be filed in a contour to fit the rounded contour of the ring. The twisted wire will be rounded and soldered and then shaped into the oval of the setting. Below is a picture of the ring nearly completed.
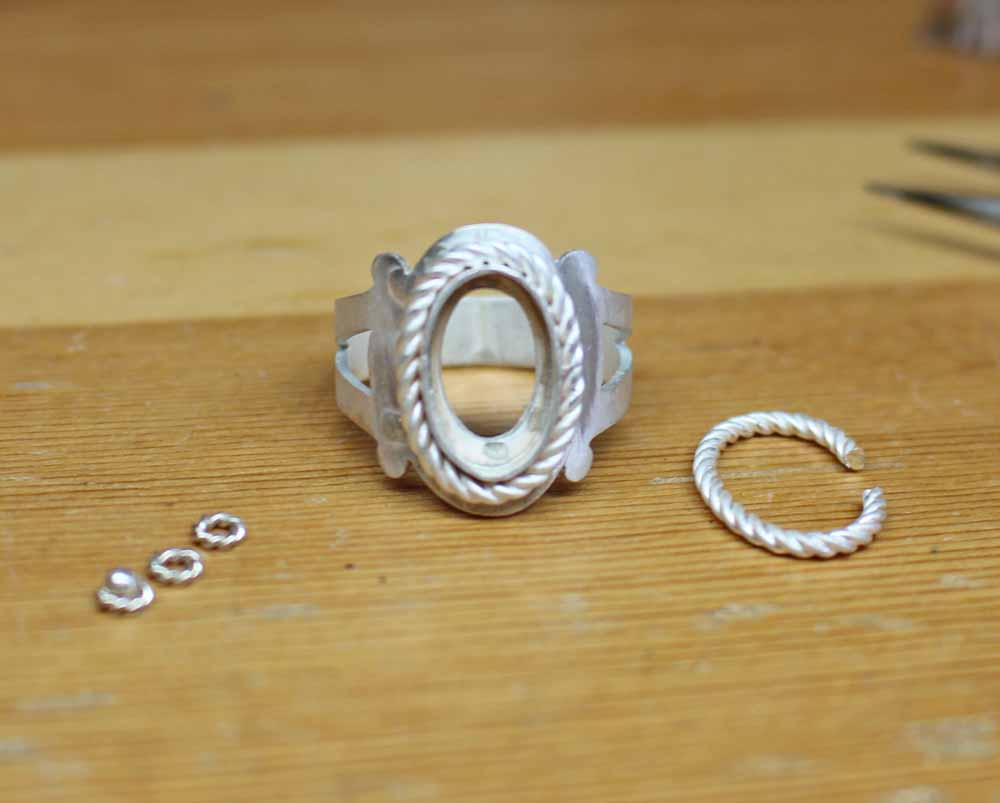
And like the tanzanite ring, I made a quick decision to add more decorative elements. In the picture above, you can see small twisted wire rings, one with a silver ball on it. I will add this decorative element to the ring and then finish it in the same way as the tanzanite ring. Below is a picture of the completed ring ready for the wearing.
